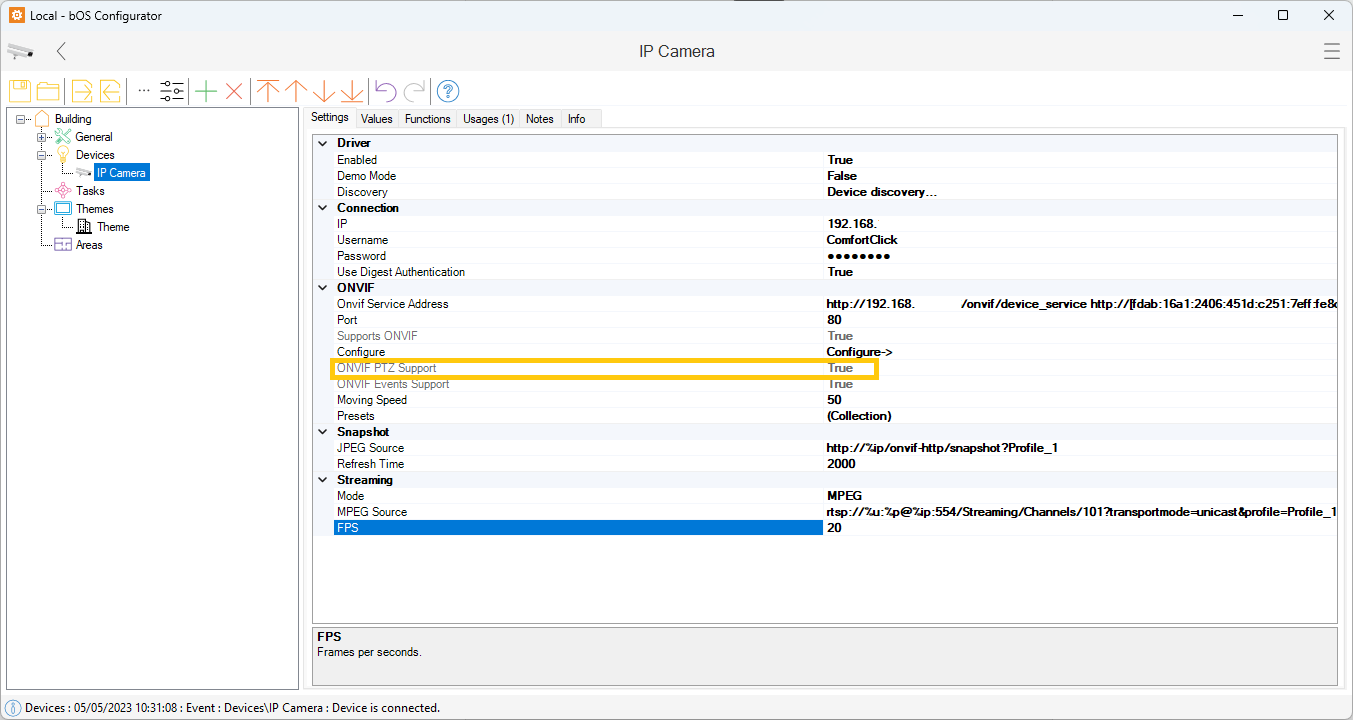
Enabling and the use of PTZ function
The PTZ (pan-tilt-zoom) function allows the user to move the camera around and capture a wider view of the surrounding area. To configure and enable PTZ on an IP camera, follow these steps:
- Fill out all the connection settings for the camera.
- Make sure the ONVIF protocol is enabled and working properly through bOS.
- Check if the camera supports PTZ functions by verifying the ONVIF PTZ support value as "True".
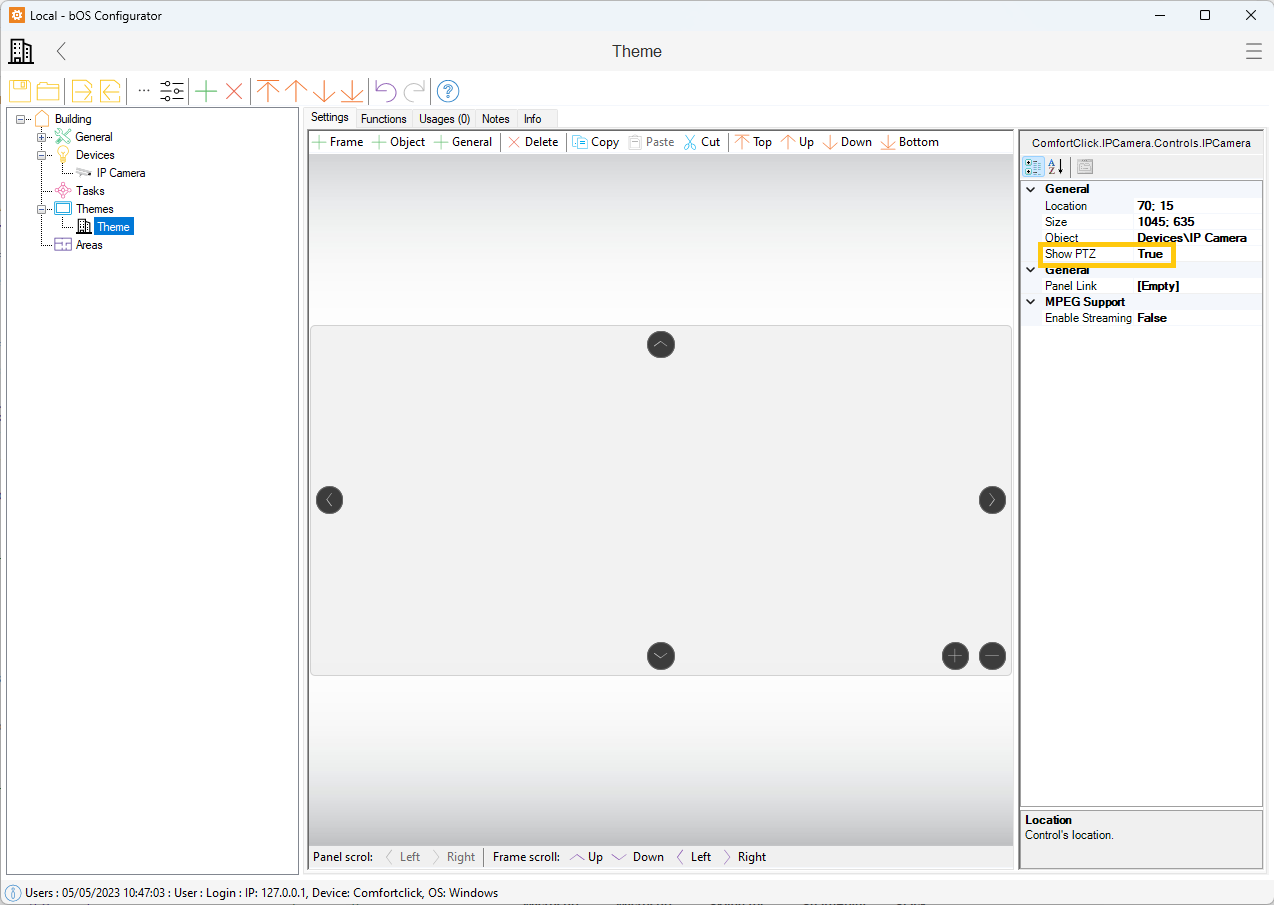
Once the IP camera is configured, follow these steps to enable PTZ functionality:
- Drag and drop the main IP Camera node into the visualization.
- Select the camera in the theme and enable "Show PTZ" function on the right side.
- Movement arrows will appear on each corner of the frame with the option to zoom in and out.
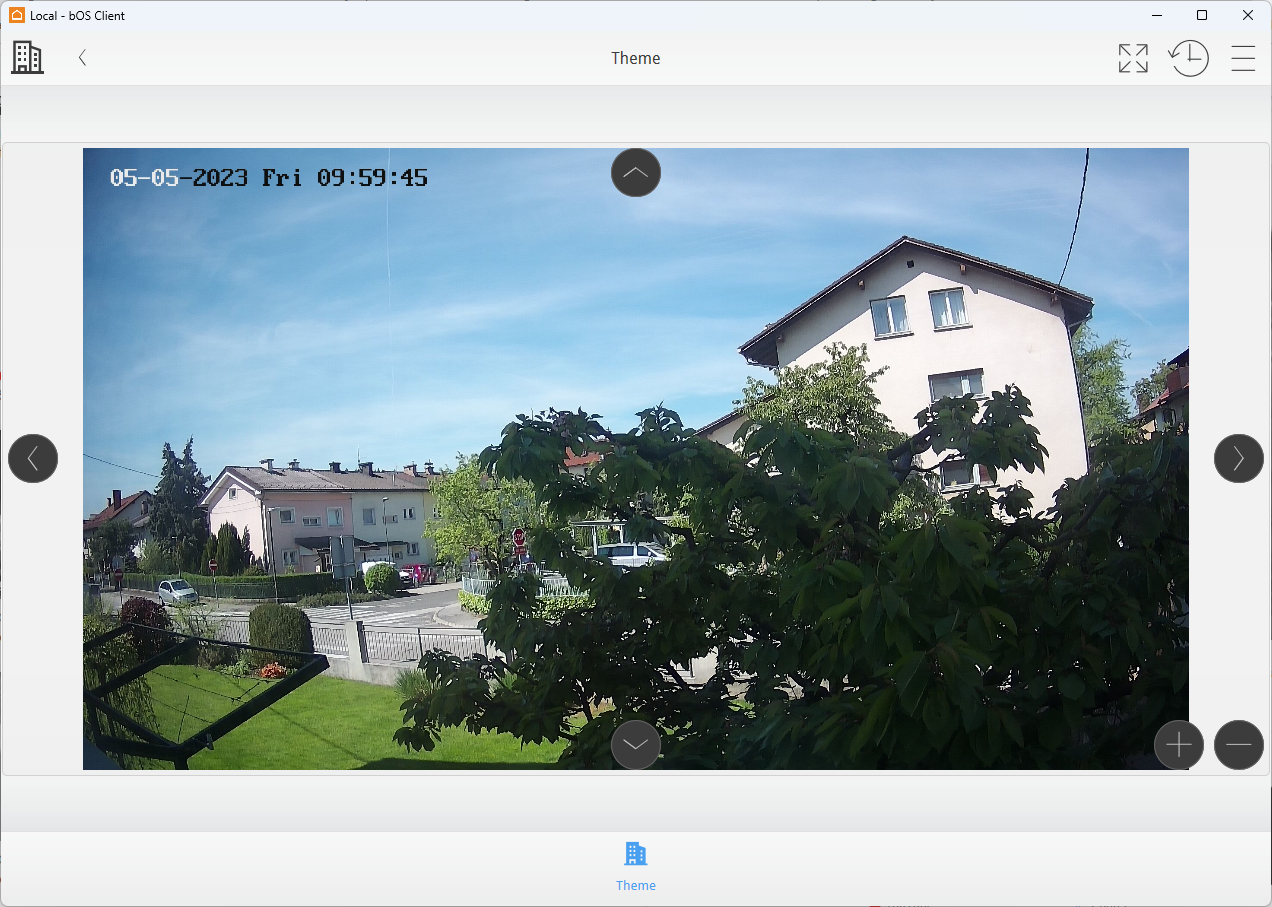
After configuring the PTZ function, clients can use the bOS client to view the current camera view and control the camera by moving the lens in all directions and zooming in and out as needed.
Customer support service by UserEcho
